

はじめに
今回はReactでOpenSteetMapの地図を表示して、その上にPolylineやMarker、Popupで地上絵を描く方法について紹介します。
これを応用すれば、経路を地図表示したり、好きな場所をマークしたりできます。
ちなみに一番時間がかかったのは下絵→緯度経度の変換です。
Leafletを用いた地図表示はこちらを参考にさせていただきました。
使ったもの
- React
- Leaflet
- OpenStreetMap
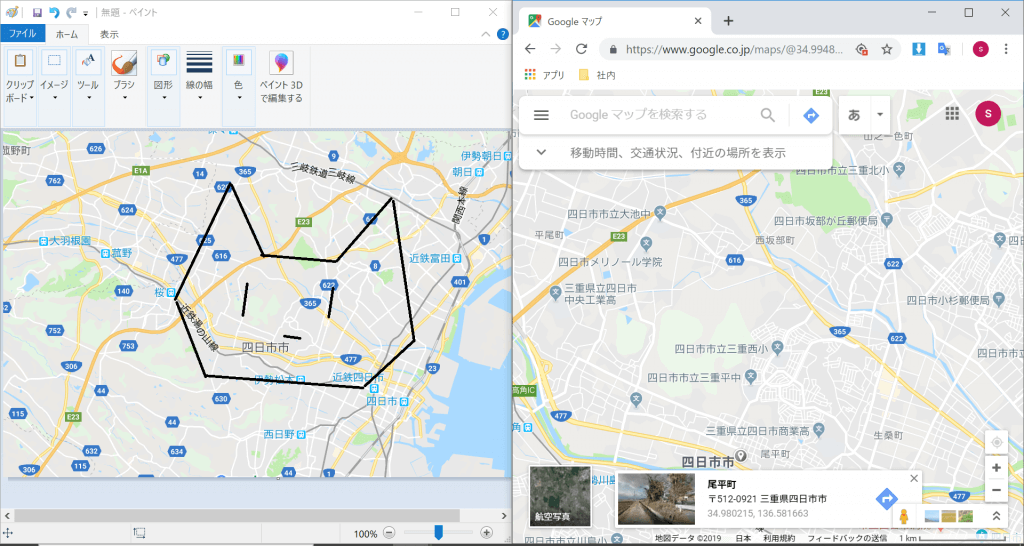
下絵と緯度経度の準備
Google Mapsを用いて、イラストの線を書くための緯度経度を取得していきます。
イラストの線の端の点をGoogle Mapsでワンクリックすると、緯度経度を取得できます。
実装方法
Reactアプリのひな型を作成し、パッケージのインストールを行います。
// Reactのひな型プロジェクトの作成
create-react-app leaflet_test
// パッケージのインストール
npm install leaflet react-leaflet
パッケージのインストールで以下のようなエラーがでることがあります。
npm ERR! Maximum call stack size exceededその場合は、もう一度パッケージのインストールコマンドを実行しなおしてください。
次にコードを変更していきます。
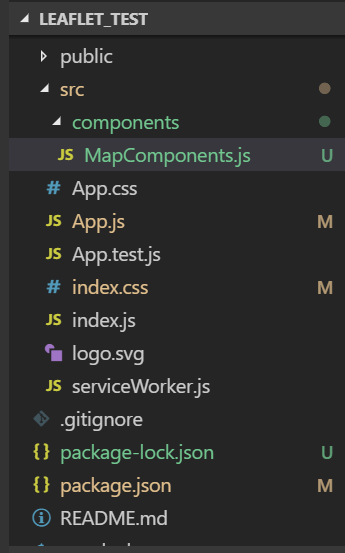
先にファイル構成を示します。ひな型にcomponentsフォルダを作成して、MapComponents.jsを追加した形になります。変更するファイルはApp.js、index.cssです。
MapComponents.jsは以下のように変更します。
Leafletを用いて、PolyLineを引いたり、Popup単体や複数のMarkerの表示をしています。
import React, { Component } from "./node_modules/react";
import Leaflet from "./node_modules/leaflet";
import { Map, TileLayer, Polyline, Marker, Popup } from "./node_modules/react-leaflet";

Leaflet.Icon.Default.imagePath =
  "//cdnjs.cloudflare.com/ajax/libs/leaflet/1.5.1/images/";

export default class MapSheet extends Component {
  constructor(props) {
    super(props);
    this.state = {
      lat: 34.96841,
      lng: 136.62732,
      zoom: 13,
      faceLine: [
        [35.007904, 136.597519],
        [35.02664, 136.622259],
        [34.982158, 136.631795],
        [34.965716, 136.614922],
        [34.970725, 136.555688],
        [34.99368, 136.542041],
        [35.032062, 136.562559],
        [35.009322, 136.577461],
        [35.007904, 136.597519]
      ],
      eyeLine1: [[34.997932, 136.600816], [34.991654, 136.599221]],
      eyeLine2: [[34.999107, 136.572963], [34.991705, 136.569218]],
      currentLocation: {
        coords: {
          lat: 34.96841,
          lng: 136.62732
        }
      },
      markers: [
        {
          title: "marker1",
          coordinates: {
            lat: 35.02664,
            lng: 136.622259
          }
        },
        {
          title: "marker2",
          coordinates: {
            lat: 35.032062,
            lng: 136.562559
          }
        }
      ],
      popup: {
        title: "",
        coordinates: {
          lat: 34.983396,
          lng: 136.587074
        }
      }
    };
  }

  render() {
    const osmAttribution =
      '© <a href="http://osm.org/copyright">OpenStreetMap</a> contributors';
    const osmDefaultUrl =
      "http://<osmサーバー>/osm_tiles/{z}/{x}/{y}.png";
    // サーバー立てていない場合は"https://{s}.tile.openstreetmap.org/{z}/{x}/{y}.png"

    const position = [this.state.lat, this.state.lng];

    return (
      <Map center={position} zoom={this.state.zoom}>
        <TileLayer attribution={osmAttribution} url={osmDefaultUrl} />
        <Polyline positions={this.state.faceLine} />
        <Polyline positions={this.state.eyeLine1} />
        <Polyline positions={this.state.eyeLine2} />
        <Popup
          position={this.state.popup.coordinates}
          autoClose={false}
          closeButton={false}
        >
          {this.state.popup.title}
        </Popup>
        {this.state.markers.map((marker, index) => (
          <Marker key={index} position={marker.coordinates} />
        ))}
      </Map>
    );
  }
}
App.jsは以下のように変更します。
import React, { Component } from "react";
import "./App.css";
import "leaflet/dist/leaflet.css";
import MapComponents from "./components/MapComponents";

class App extends Component {
  render() {
    return <MapComponents />;
  }
}

export default App;
index.cssは以下のように変更します。
html,
body {
  padding: 0;
  margin: 0%;
  width: 100%;
  height: 100%;
}

#root {
  width: 100%;
  height: 100%;
}

.leaflet-container {
  width: 100%;
  height: 100%;
}
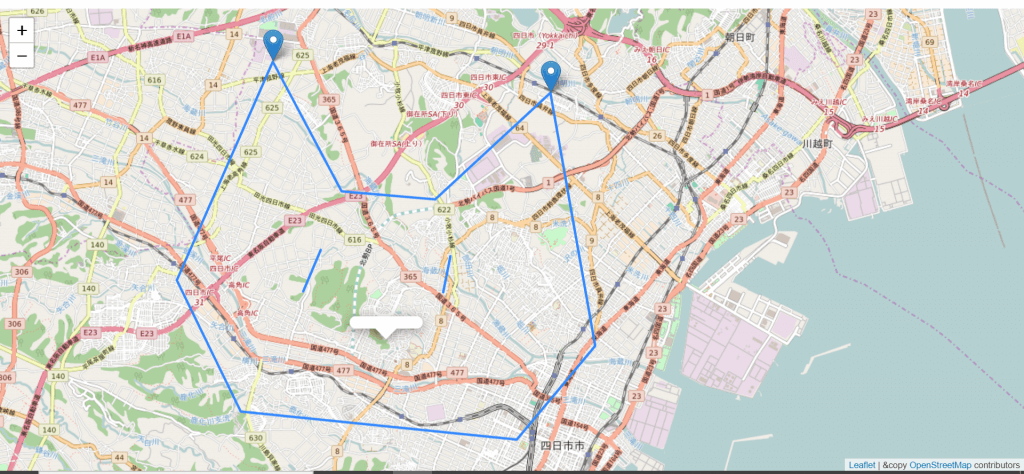
それでは、以下のコマンドで実行していきます。
npm start実行した結果が以下です。
四日市市にかわいい?にゃすかの地上絵を書くことができました。
おわりに
今回はReactでOpenSteetMapの地図を表示して、その上にPolylineやMarker、Popupで地上絵を描く方法について紹介しました。
絵心があればもっと素敵な地上絵が描けると思います。


![Microsoft Power BI [実践] 入門 ―― BI初心者でもすぐできる! リアルタイム分析・可視化の手引きとリファレンス](/assets/img/banner-power-bi.c9bd875.png)
![Microsoft Power Apps ローコード開発[実践]入門――ノンプログラマーにやさしいアプリ開発の手引きとリファレンス](/assets/img/banner-powerplatform-2.213ebee.png)
![Microsoft PowerPlatformローコード開発[活用]入門 ――現場で使える業務アプリのレシピ集](/assets/img/banner-powerplatform-1.a01c0c2.png)