はじめに
Azure Machine Learning StudioでWeb APIを作成しました。このWeb APIを実運用する際には、日々モデルの再トレーニングが必要となってきます。そこで公式ドキュメント(https://docs.microsoft.com/ja-jp/azure/machine-learning/studio/retrain-classic-web-service)を参考に進めていったのですが、かなり詰まってしまったのでやり方を共有しておきたいと思います。
Webサービスのデプロイ
まずはWebサービス(Web API)の作成をします。詳しいやり方は公式ドキュメント(https://docs.microsoft.com/ja-jp/azure/machine-learning/studio/create-experiment)を参照してください。
予測Webサービスの作成
中のロジックはともかく、だいたいこのような図になるかと思います。
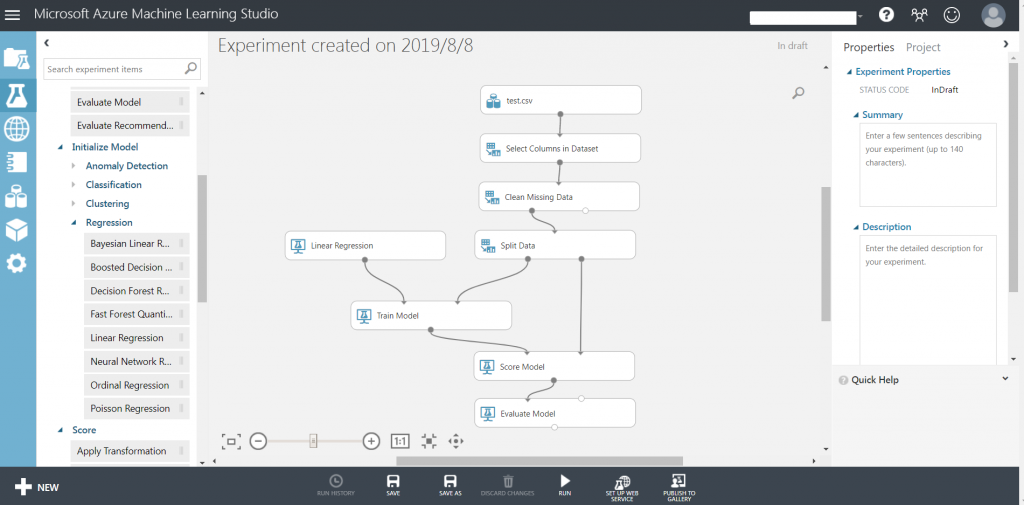
そこでRUN -> SET UP WEB SERVICE -> Predictive Web service[Recommend]
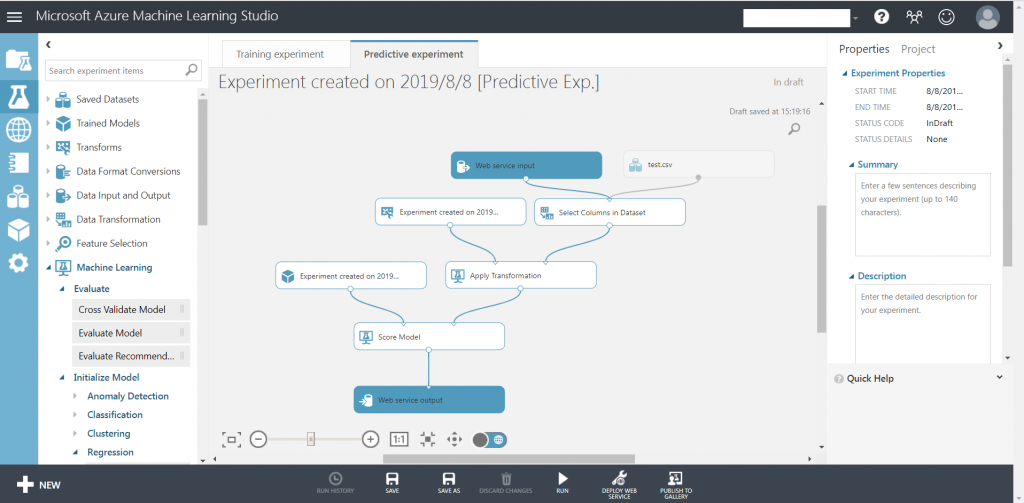
RUN -> DEPLOY WEB SERVICE -> Deploy Web Service[Classic]
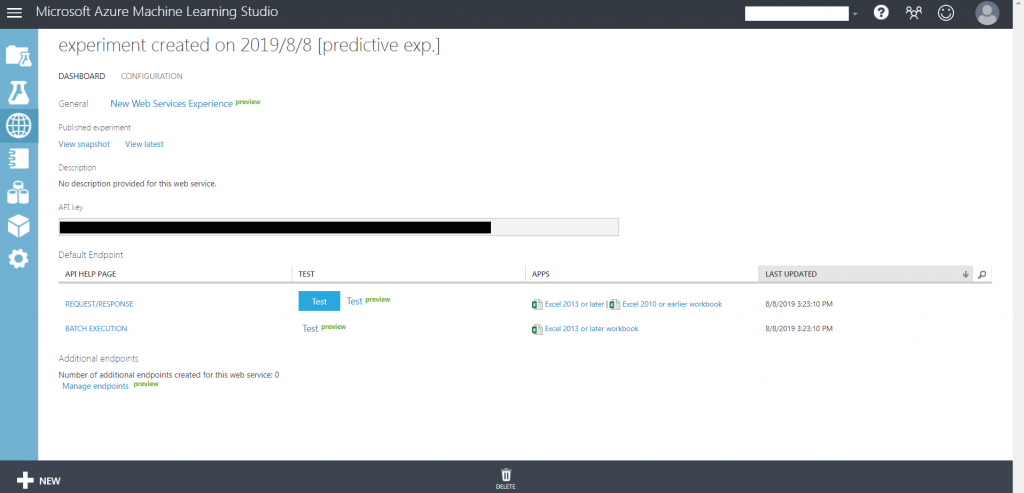
これで予測Webサービスがデプロイされました。
再トレーニングWebサービスの作成
こちらのドキュメント(https://docs.microsoft.com/ja-jp/azure/machine-learning/studio/retrain-machine-learning-model)を参考に進めました。
サイドバーのExperiments -> 始めに作成したトレーニングWebサービス(Predictiveではないほう) -> SET UP WEB SERVICE -> Retraining Web Service
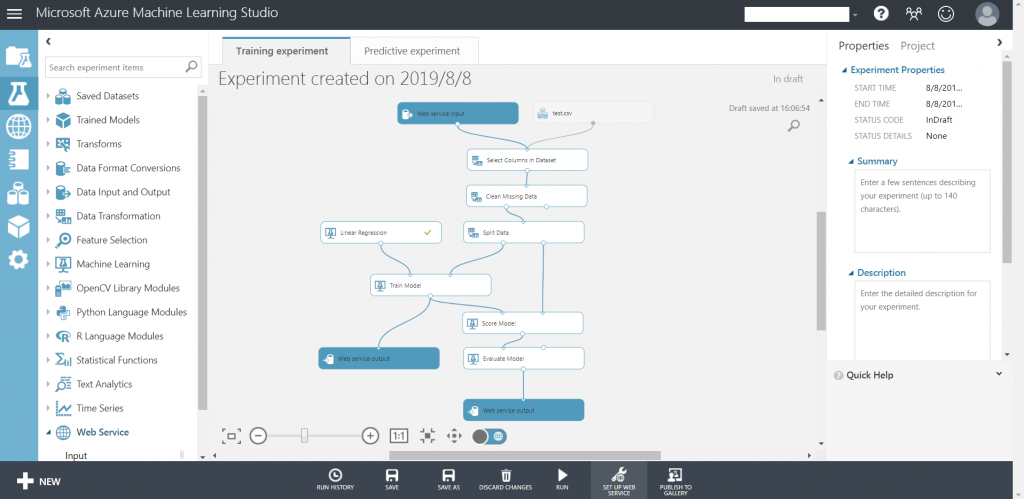
RUN -> SET UP WEB SERVICE -> Deploy Web Service[Classic]
これで再トレーニングWebサービスがデプロイされました。
再トレーニングの実行
次に新しいデータセットを用いてモデルの再トレーニングを行います。
再トレーニングの流れは、
- 新しいデータセットをローカルからBlobへアップロードする
- Blobのデータセットで再トレーニングさせる
- 再トレーニングモデルをBlobへアップロードする
となります。 そのため、事前準備としてAzure上にBlobを作成しておく必要があります(Azure Machine Learning StudioワークスペースをAzureポータル上で作成した場合は自動的に作成されています)。
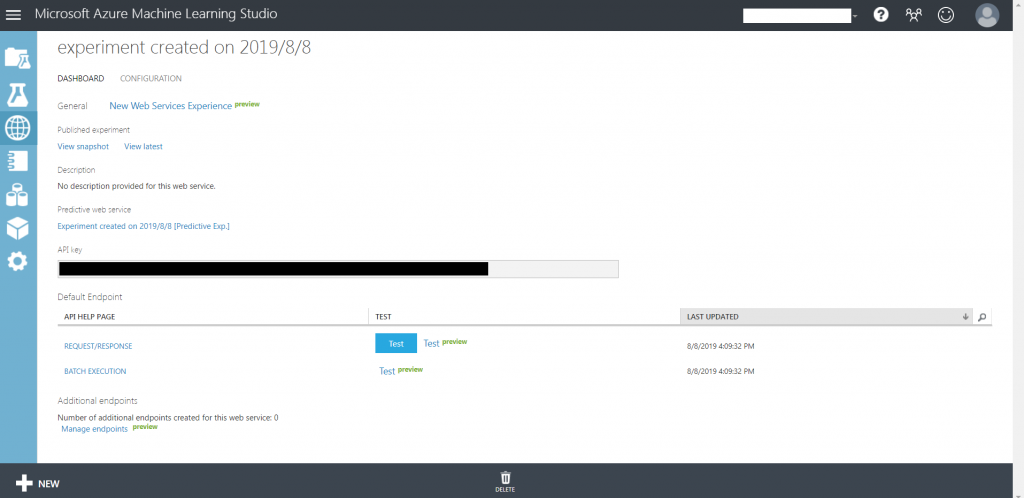
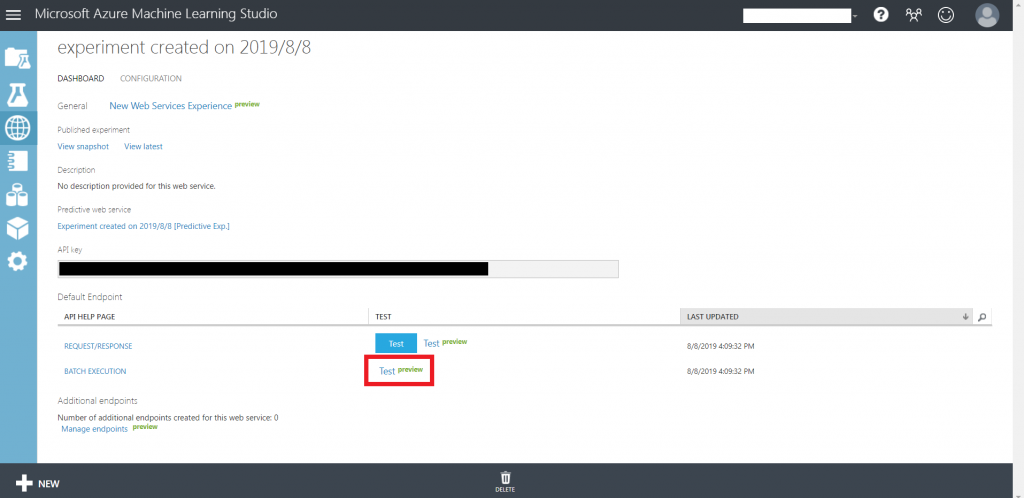
サイドバーのWeb Services -> 再トレーニングWebサービス -> test
Consume -> Sample Code -> Batch
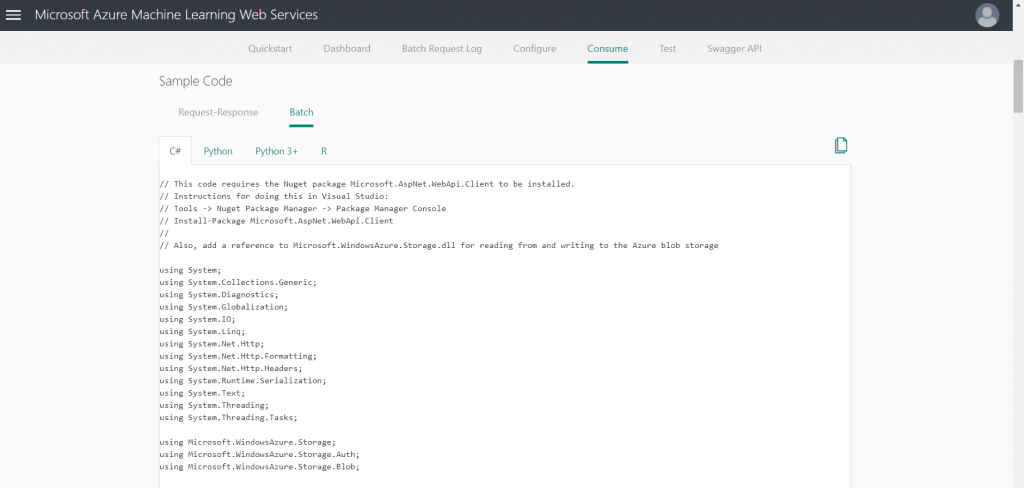
サンプルコードを実行するため、Visual StudioからC#コンソールアプリケーションを作成します。 [新規] > [プロジェクト] > [Visual C#] > [Windows Classic Desktop] > [コンソール アプリ (.NET Framework)]
作成されたProgram.csにBatchのサンプルコードを貼り付けます。このとき、apiKeyやStorageAccountName等を適切なものに置き換えます。
また、NugetパッケージのMicrosoft.AspNet.WebApi.Clientをインストールします。
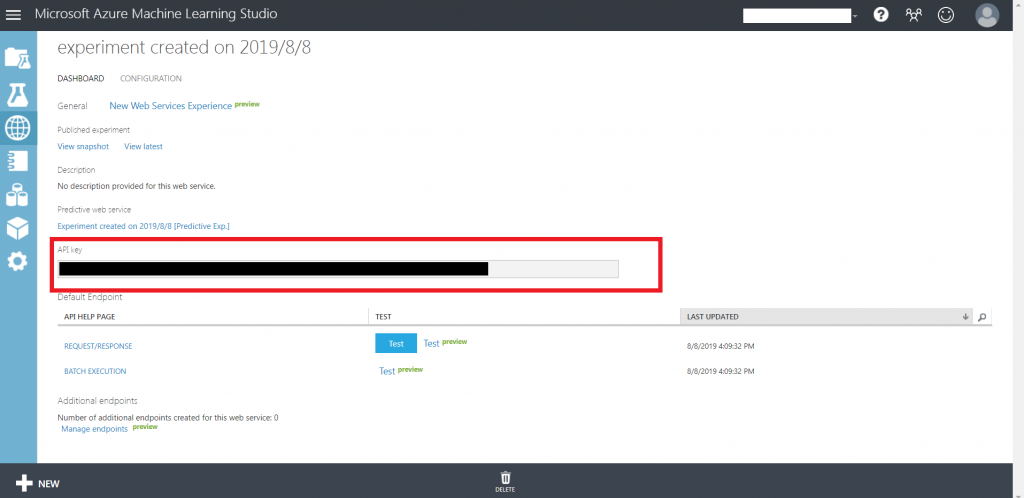
const string apiKey = "abc123"; // Replace this with the API key for the web serviceapiKey:再トレーニングWebサービスのAPI Key
const string StorageAccountName = "mystorageacct"; // Replace this with your Azure Storage Account name
const string StorageAccountKey = "a_storage_account_key"; // Replace this with your Azure Storage Key
const string StorageContainerName = "mycontainer"; // Replace this with your Azure Storage Container nameStorageAccountName:ストレージアカウント名
StorageAccountKey:ストレージアカウントのアクセスキー
StorageContainerName:コンテナ名
UploadFileToBlob("input1data.file_extension" /*Replace this with the location of your input file, and valid file extension (usually .csv)*/,
                    "input1datablob.file_extension" /*Replace this with the name you would like to use for your Azure blob; this needs to have the same extension as the input file */,
StorageContainerName, storageConnectionString);"input1",
new AzureBlobDataReference()
{
ConnectionString = storageConnectionString,
RelativeLocation = string.Format("{0}/input1datablob.file_extension",
StorageContainerName)
}input1data.file_extension:新しいデータセットのアドレス
input1datablob.file_extension:保存するデータセットのBlob上での名前
{
    "output2",
        new AzureBlobDataReference()
        {
            ConnectionString = storageConnectionString,
                               RelativeLocation = string.Format("{0}/output2results.file_extension", StorageContainerName) /*Replace this with the location you would like to use for your output file, and valid file extension (usually .csv for scoring results, or .ilearner for trained models)*/
        }
},
{
    "output1",
        new AzureBlobDataReference()
        {
            ConnectionString = storageConnectionString,
                               RelativeLocation = string.Format("{0}/output1results.file_extension", StorageContainerName) /*Replace this with the location you would like to use for your output file, and valid file extension (usually .csv for scoring results, or .ilearner for trained models)*/
        }
},output2results.file_extension:再トレーニング済みモデル名(拡張子を.ilearnerにする)
output1results.file_extension:再トレーニングのログファイル名(拡張子を.csvにする)
コンソールアプリを実行すると再トレーニングが実行され、再トレーニング済みモデルがBlob Storageに出力されます。
再トレーニングモデルの適用
新たにエンドポイントを作成し、それに対して再トレーニングモデルの適用を行います。エンドポイントは予測Webサービスに追加します。
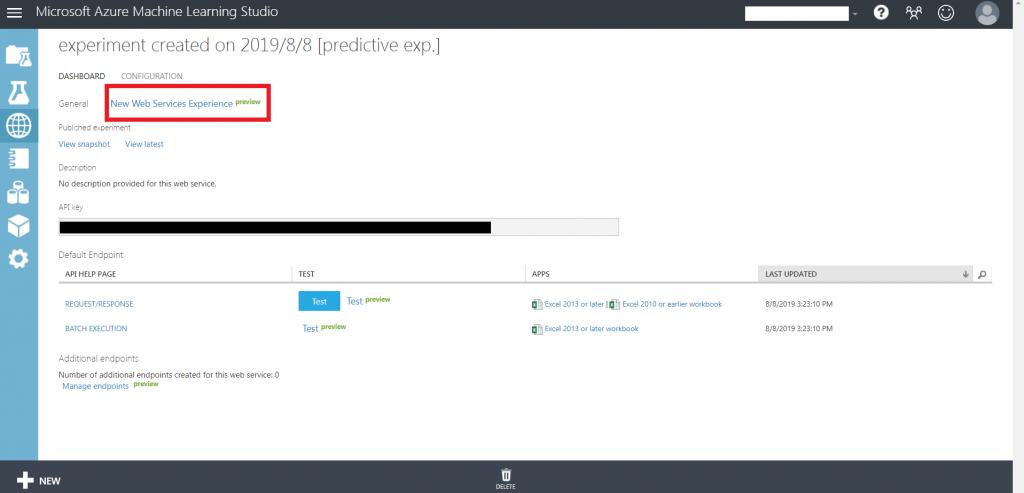
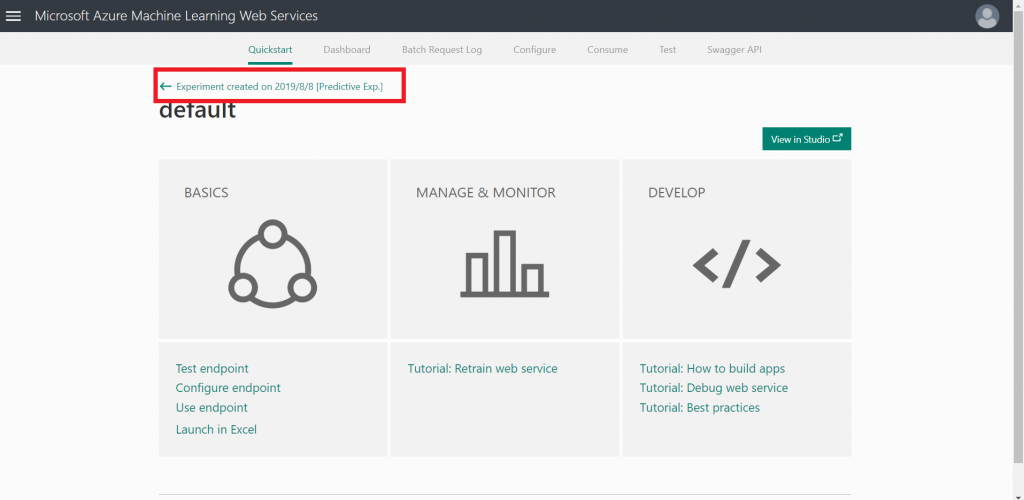
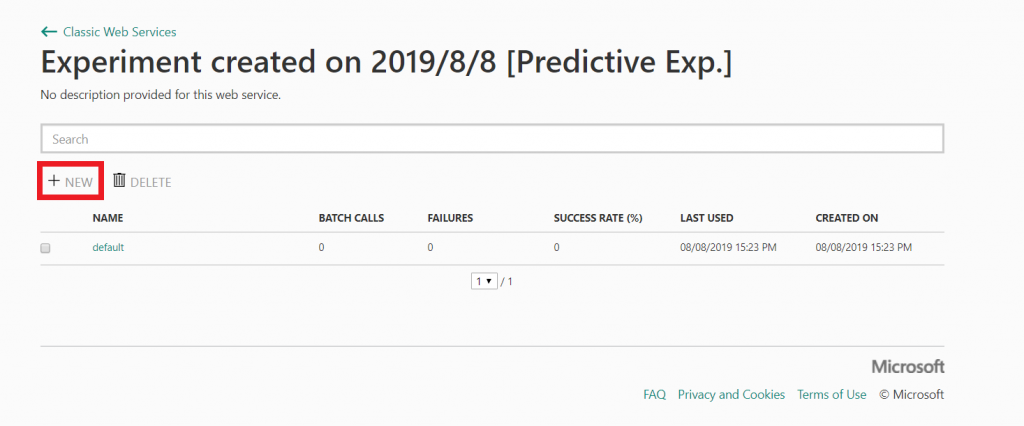
サイドバーのWeb Services -> 予測Webサービス -> New Web Services Experience -> 戻るボタン -> NEW
適当な名前を付けてエンドポイントを作成します。
エンドポイントの名前 -> Consume -> PATCH api help

再トレーニングと同様にコンソールアプリケーションを作成し、サンプルコードを貼り付けます。
apikeyやBaseLocation等も適宜置き換えます。
作成したコンソールアプリケーションを実行すると、指定したBlob上の再トレーニングモデルが作成したエンドポイントへ適用されます。
おわりに
いろいろ調べたのですが、Classic版でないとC#プログラム上からの更新はできないみたいでした(new版はPowerShellでの更新)。できるよ!ということであれば教えていただきたいです。
ともあれ、C#から更新ができたので他のAPIとの連携がしやすくなりました。




![Microsoft Power BI [実践] 入門 ―― BI初心者でもすぐできる! リアルタイム分析・可視化の手引きとリファレンス](/assets/img/banner-power-bi.c9bd875.png)
![Microsoft Power Apps ローコード開発[実践]入門――ノンプログラマーにやさしいアプリ開発の手引きとリファレンス](/assets/img/banner-powerplatform-2.213ebee.png)
![Microsoft PowerPlatformローコード開発[活用]入門 ――現場で使える業務アプリのレシピ集](/assets/img/banner-powerplatform-1.a01c0c2.png)


