この記事はFIXER 3rd Advent Calendar 2020 (https://adventar.org/calendars/5928) 7日目の記事です。
前日はこちら(https://tech-blog.cloud-config.jp/2020-12-05-tired-making-chatbot-2)
次回は、Power Apps 関連の記事です!
はじめに
Power Platform を好奇心でいじってるエンジニア歴 2 年目の、横田です!
今回は、Azure の「QnA Maker」と「Azure Bot Service」を使って、Webアプリで動かせるチャットボットを作ったので、その連載記事の3記事目になります!
その他の連載記事
今回は「Azure Bot Service」で作ったチャットボットを Nuxt で作った Webアプリに乗せて、App Service にデプロイしていくハンズオンを紹介していきます!セキュリティ面とかコーディング等はぐちゃぐちゃですがご容赦ください。
それではやっていきましょう!
ハンズオン
Azure Bot Service(DirectLine)のトークンを取得する Functions を作成する
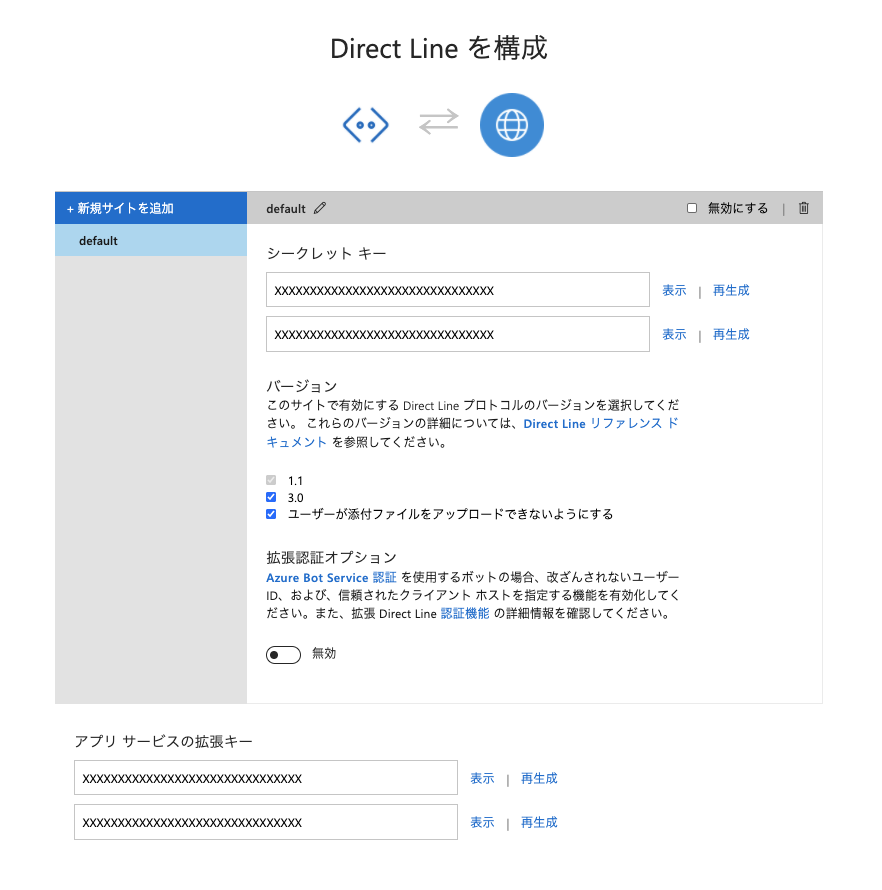
1. DirectLine のシークレットキーを取得する
Azure Bot Service のチャンネルにある地球のアイコンをクリックしたら取得できます
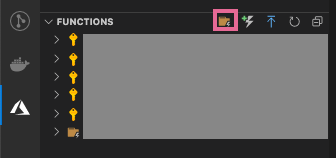
2. VSCodeのAzureの拡張機能からFunctions用のプロジェクトを作る
フォルダのアイコンから作成できます
3. ファンクションのコードを作成する
using System.Threading.Tasks;
using Microsoft.AspNetCore.Mvc;
using Microsoft.Azure.WebJobs;
using Microsoft.Azure.WebJobs.Extensions.Http;
using Microsoft.AspNetCore.Http;
using Microsoft.Extensions.Logging;
using Newtonsoft.Json;
using System.Net.Http;
using System.Net.Http.Headers;

namespace AzureBotService.DirectLine.GetToken
{
    public static class AzureBotServiceDirectLineGetToken
    {
        [FunctionName("AzureBotServiceDirectLineGetToken")]

        public static async Task<IActionResult> Run([HttpTrigger(AuthorizationLevel.Anonymous, "get", "post", Route = null)] HttpRequest req, ILogger log)
        {
            AzureBotService abs = new AzureBotService();
            var response = await abs.GetToken();

            return new OkObjectResult(response.Token);
        }
    }
    public class AzureBotService
    {
        private string directLineEndpoint = "https://directline.botframework.com/v3/directline/tokens/generate";
        public async Task<IGetTokenResponse> GetToken()
        {
            var client = new HttpClient();
            client.DefaultRequestHeaders.Authorization = new AuthenticationHeaderValue("Bearer", "DirevtLineのシークレットキーを指定");
            var response = await client.PostAsync(directLineEndpoint, null);
            var responseResult = response.Content.ReadAsStringAsync().Result;
            var responseResultDeserialized = JsonConvert.DeserializeObject<IGetTokenResponse>(responseResult);
            return responseResultDeserialized;
        }
    }
    public class IGetTokenResponse
    {
        /// 会話のID
        public string ConversationId { get; set; }

        /// トークン
        public string Token { get; set; }

        /// 有効時間(秒数)
        [JsonProperty("expires_in")]
        public int ExpiresIn { get; set; }
    }
}
4. デプロイする
上矢印のアイコンから、サブスクやフォルダを指定してデプロイします
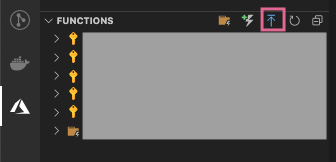
5. トークンが取得できるか確認する
Azure Portal からFunctions のエンドポイントを確認して、「エンドポイント/api/ファンクション名(今回のコードで言えば AzureBotServiceDirectLineGetToken)」をブラウザで叩いて文字列が取得できれば完成です!
※ CORSの設定にローカルホストのURLを追加しないといけないかもしれないです

Nuxt でチャットボットを乗せた Web アプリを作成する
1. Nuxt のアプリを初期化する
npx create-nuxt-app <project-name>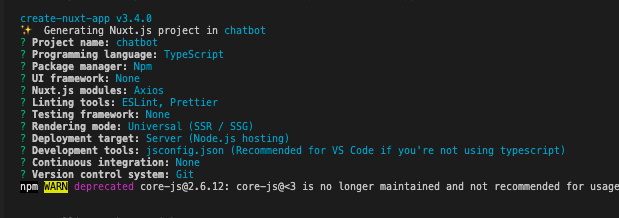
2. チャットボットをトークンを利用して呼び出せるように実装する
※ ローカルで動かしてみて、動くように微調整してください
※ axios のインストール(npm install axios)が必要かもしれません
<template>
  <div class="chatbot-wrapper">
    <h1>Git の Chatbot</h1>
    <iframe
      :src="`https://webchat.botframework.com/embed/chatbot-git-bot?t=${token}`"
    >
    </iframe>
  </div>
</template>

<script lang="ts">
import Vue from 'vue'
import axios from 'axios'

export default Vue.extend({
  async asyncData() {
    /// Token取得
    const { data } = await axios.get(
      'https://directline-gettoken.azurewebsites.net/api/AzureBotServiceDirectLineGetToken'
    )
    return {
      token: data,
    }
  },
})
</script>

<style scoped>
.chatbot-wrapper {
  padding: 10px;
}
.chatbot-wrapper > h1 {
  color: #3a3a3a;
}
.chatbot-wrapper > iframe {
  width: 500px;
  height: 600px;
}
</style>
App Service にデプロイして動かしてみる
1. App Service のリソースを作成する
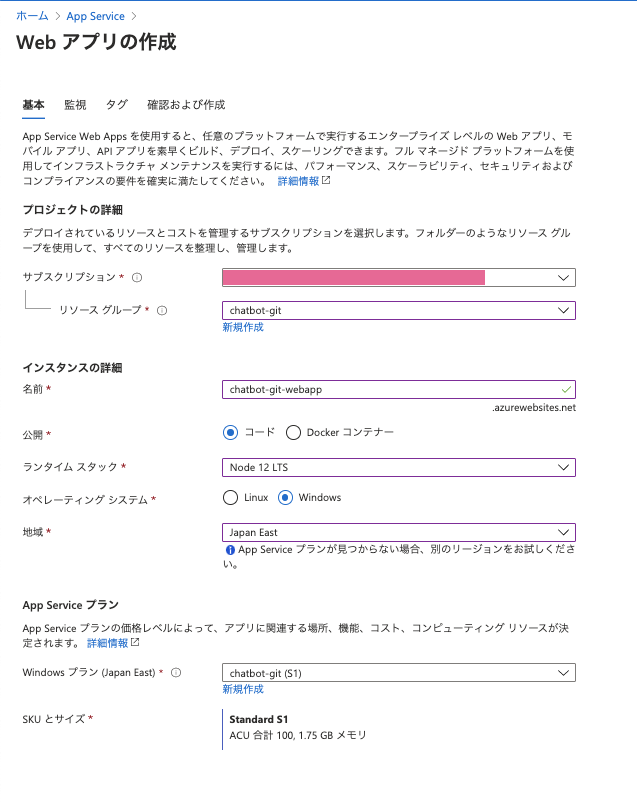
2. ビルドする
npm run generate3. App Service にデプロイする
上矢印のアイコンからデプロイできます
※ビルドされたファイルは /dist のフォルダに生成されているので、/dist フォルダを指定する

4. App Service のエンドポイントを訪れてみる
完成です!!!
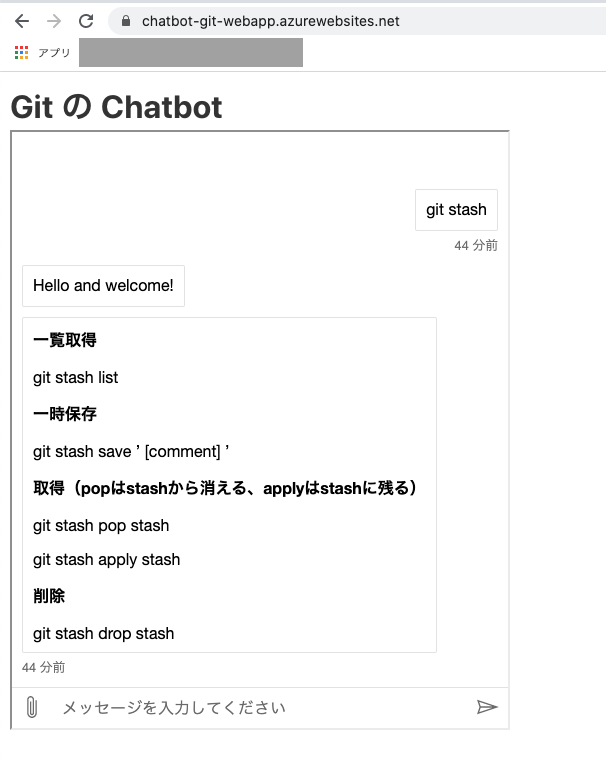
まとめ
今回は「Azure Bot Service」で作ったチャットボットを Nuxt で作った Webアプリに乗せて、App Service にデプロイしてみました!Azure Bot Service の WebChat を使う時は、トークンでやりとりするってところがミソです!
この記事で連載は終了です!それでは!
その他の連載記事



![Microsoft Power BI [実践] 入門 ―― BI初心者でもすぐできる! リアルタイム分析・可視化の手引きとリファレンス](/assets/img/banner-power-bi.c9bd875.png)
![Microsoft Power Apps ローコード開発[実践]入門――ノンプログラマーにやさしいアプリ開発の手引きとリファレンス](/assets/img/banner-powerplatform-2.213ebee.png)
![Microsoft PowerPlatformローコード開発[活用]入門 ――現場で使える業務アプリのレシピ集](/assets/img/banner-powerplatform-1.a01c0c2.png)


