

どうも。今月からCloud Native DevOps Centerに配属された和田です。
この記事は、毎週水曜にFIXER社員がAzureに関するブログを繋いでいくAzureリレー第21回の記事です。先週は渡辺さんのAzure Blob serviceのライフサイクル管理を試してみる #Azureリレーでした。
さて、Azureは日々進化を続けていて、かなりの頻度で新機能の追加やアップデートが行われているのはみなさんご存知だと思います。 そんなAzureアップデートを眺めていたら、最近Azure API ManagementからStorage AccountsがManaged Idを使ってアクセスできるようになったらしいので、試してみました。 アップデートのお知らせ記事はこちら。
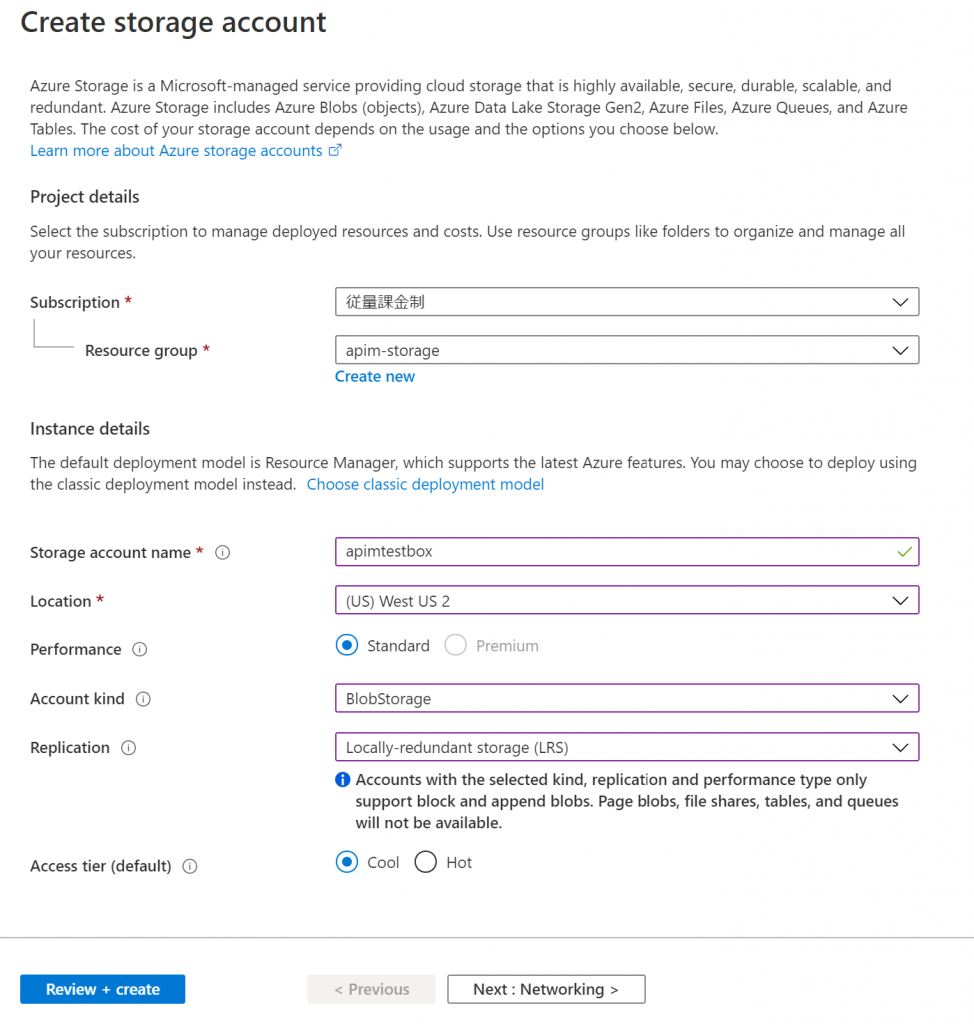
1. Storage Accountを作る
まずはAPI ManagementからアクセスするためのStorage Accountを作ります。
Barというコンテナを作り、その中にuntitled.jsonというファイルをアップロードしました。
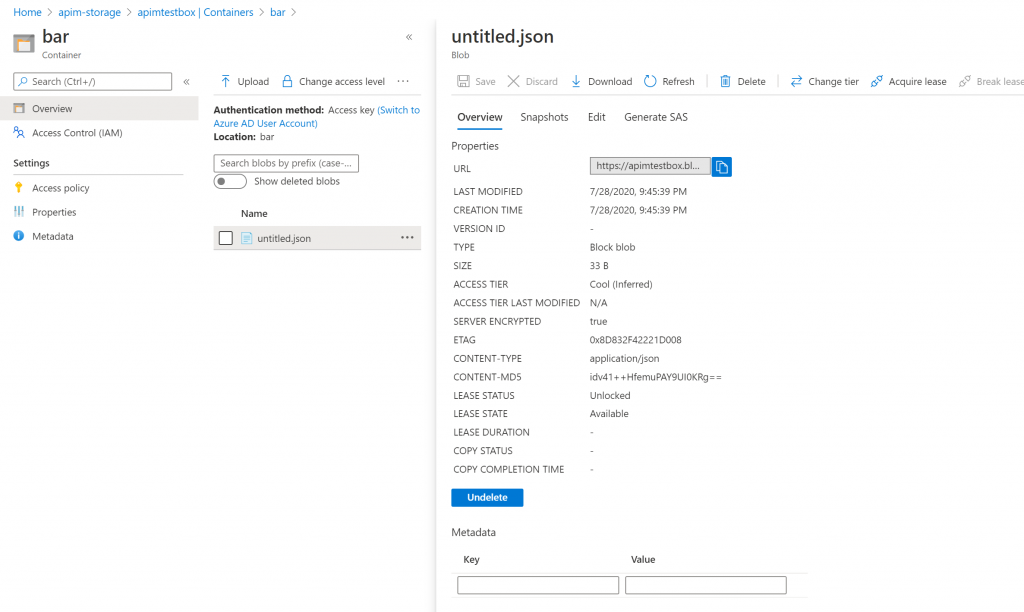
中身はこんな感じ。
JSON{
    "data": "Hello, world!"
}
APIを叩いたらレスポンスでこいつが返ってくるのが目標です。 アップロードしたら、Firewalls and virtual networksで信頼されたMicrosoftサービス以外からのアクセスを弾くように設定します。
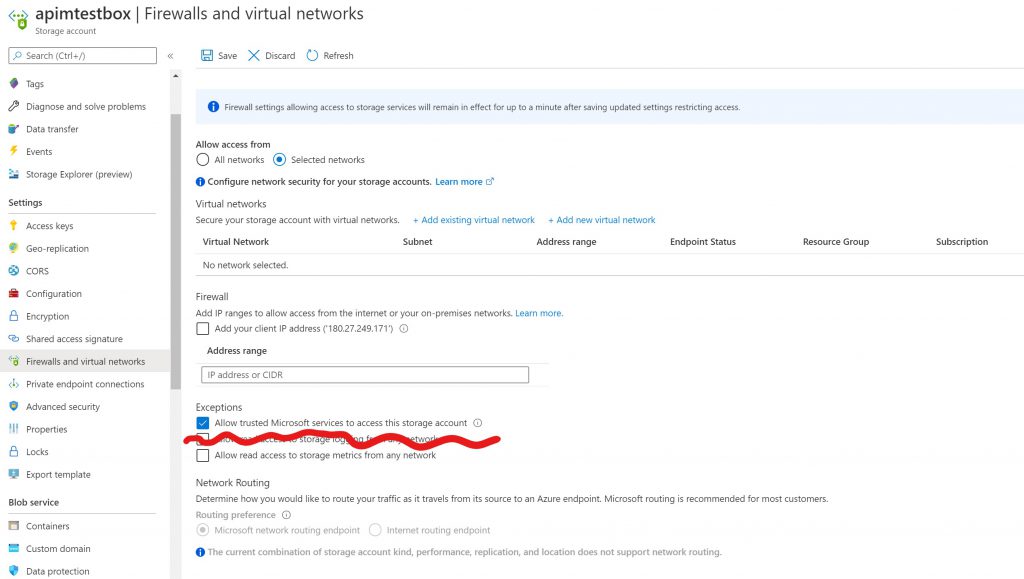
別に制限かけなくてもいいんだけど、制限かけたほうが通ったとき嬉しいし。Optionalです。
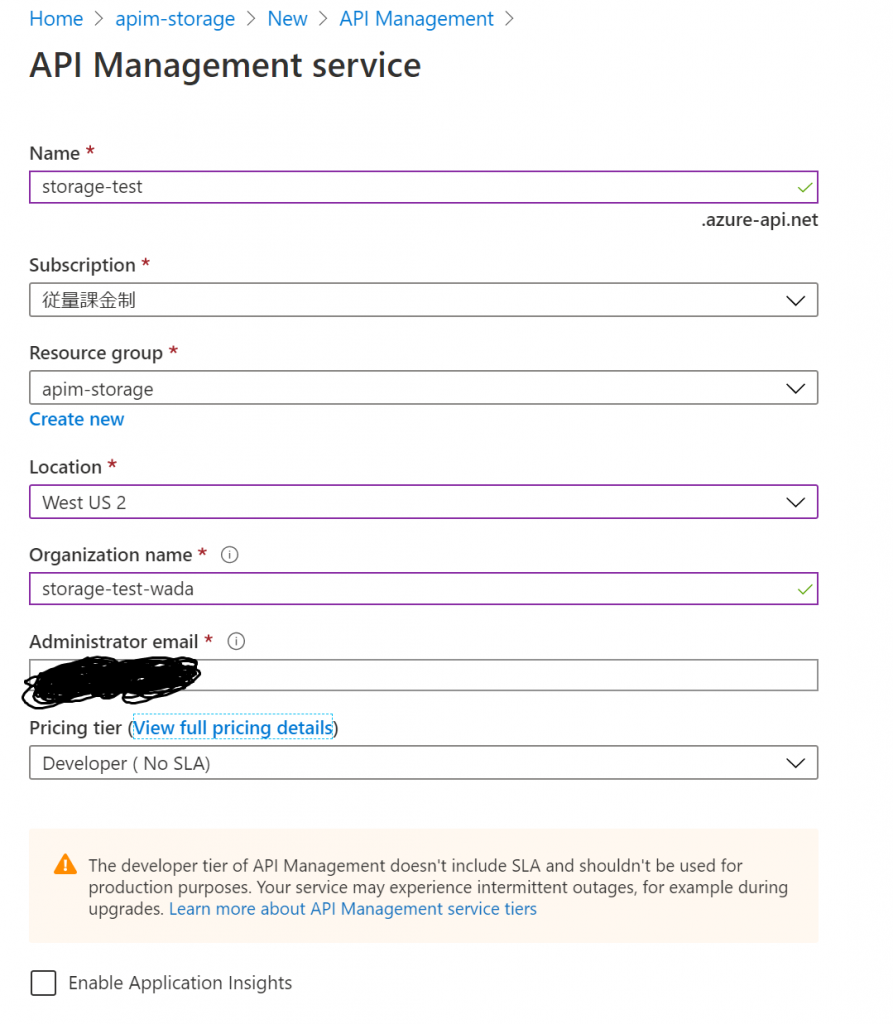
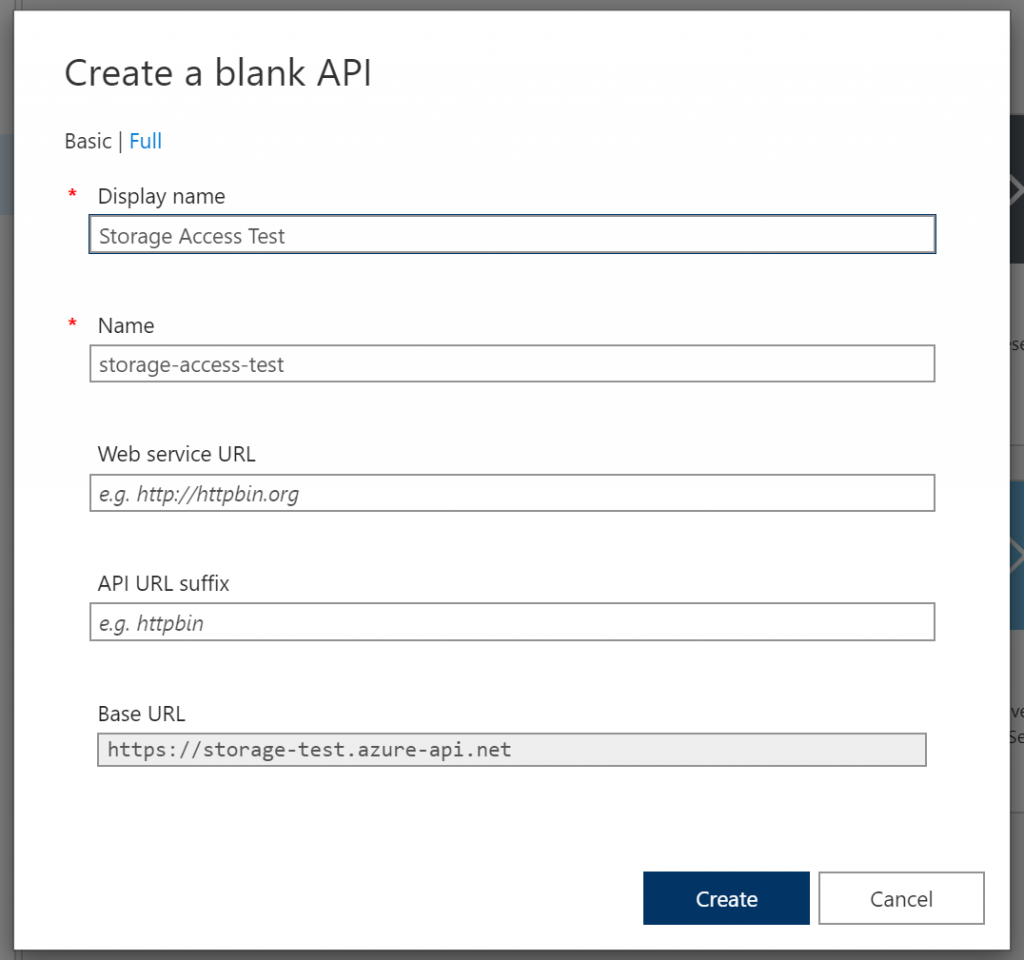
2. API Managementを作る
API Managementのリソースを作成します。
リソースのデプロイが完了したら、Add a new APIからBlank APIを作成します。
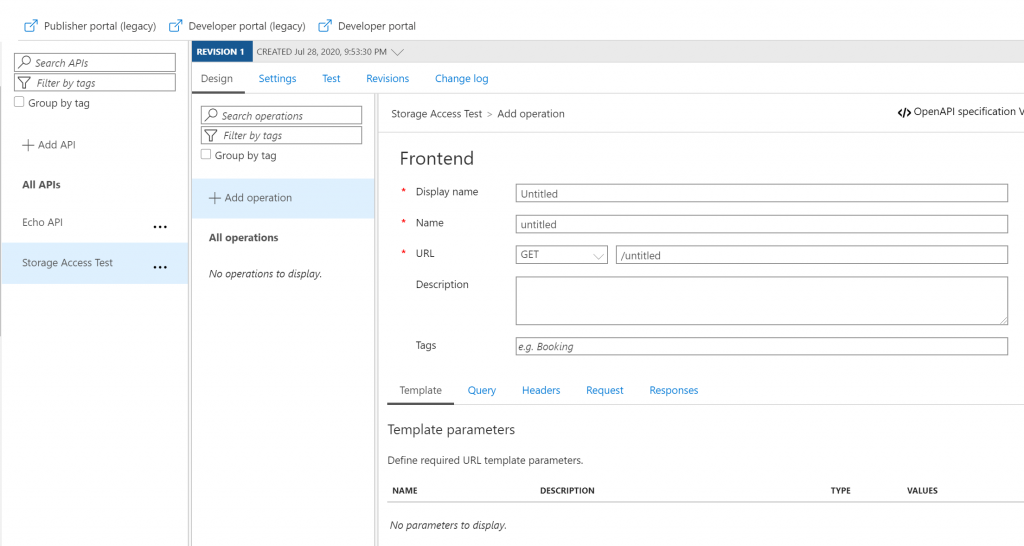
GETのOperationも追加しましょう。
Operationを追加したら、ポリシーを作成します。Inbound processingの+Add policyをクリックし、Other policiesを選択するとポリシーの入力画面が開くので、ここにポリシーを設定していきます。
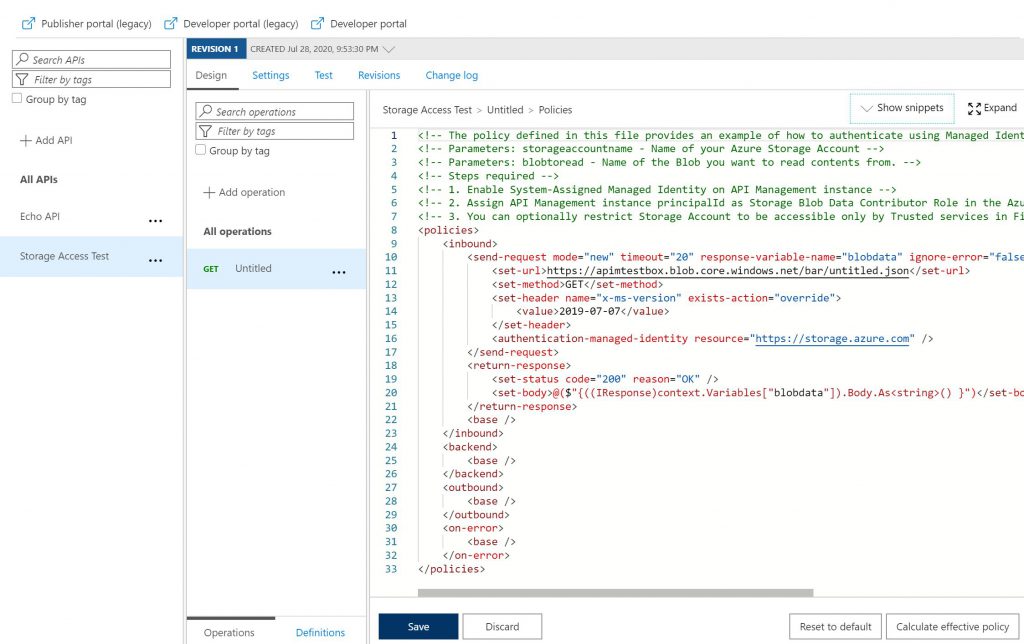
今回はサンプルを少し改変したポリシーを使用しました。
XML<!-- The policy defined in this file provides an example of how to authenticate using Managed Identity to access Storage Account and read a blob. -->
<!-- Parameters: storageaccountname - Name of your Azure Storage Account -->
<!-- Parameters: blobtoread - Name of the Blob you want to read contents from. -->
<!-- Steps required -->
<!-- 1. Enable System-Assigned Managed Identity on API Management instance -->
<!-- 2. Assign API Management instance principalId as Storage Blob Data Contributor Role in the Azure Storage Account -->
<!-- 3. You can optionally restrict Storage Account to be accessible only by Trusted services in Firewalls/VirtualNetwork in the Storage Account. -->
<policies>
    <inbound>
        <send-request mode="new" timeout="20" response-variable-name="blobdata" ignore-error="false">
            <set-url>https://apimtestbox.blob.core.windows.net/bar/untitled.json</set-url>
            <set-method>GET</set-method>
            <set-header name="x-ms-version" exists-action="override">
                <value>2019-07-07</value>
            </set-header>
            <authentication-managed-identity resource="https://storage.azure.com" />
        </send-request>
        <return-response>
            <set-status code="200" reason="OK" />
            <set-body>@($"{((IResponse)context.Variables["blobdata"]).Body.As<string>() }")</set-body>
        </return-response>
        <base />
    </inbound>
    <backend>
        <base />
    </backend>
    <outbound>
        <base />
    </outbound>
    <on-error>
        <base />
    </on-error>
</policies>
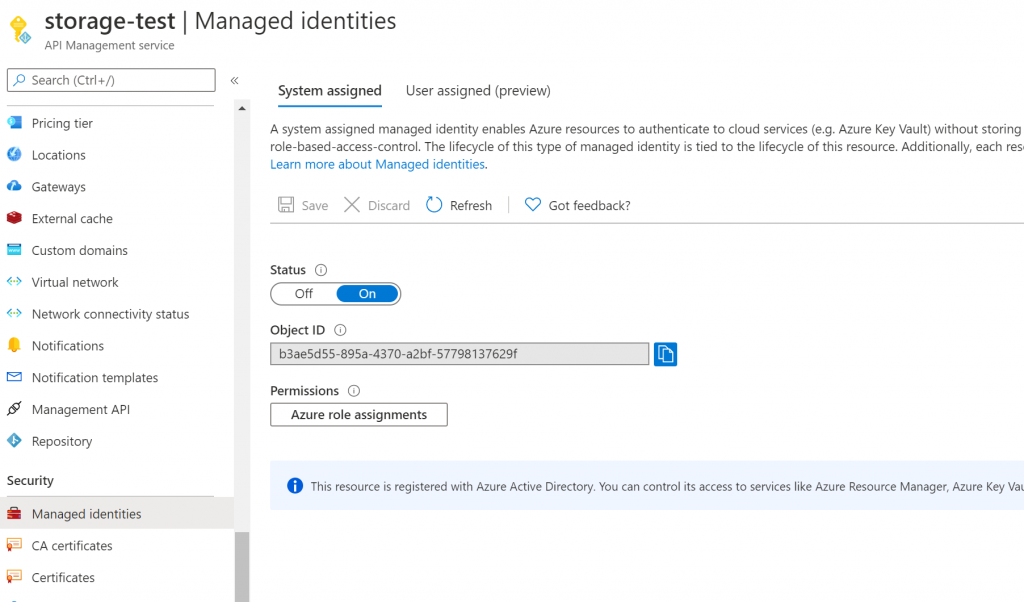
3. Managed Identityを設定する
API ManagementのメニューからManaged Identitiesを開き、System assignedのStatusをOnにして保存します。
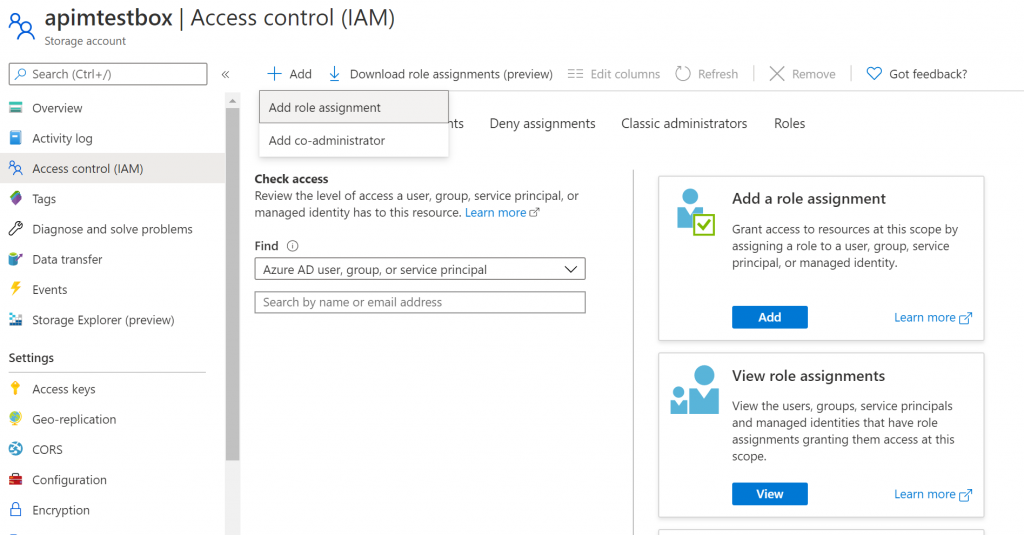
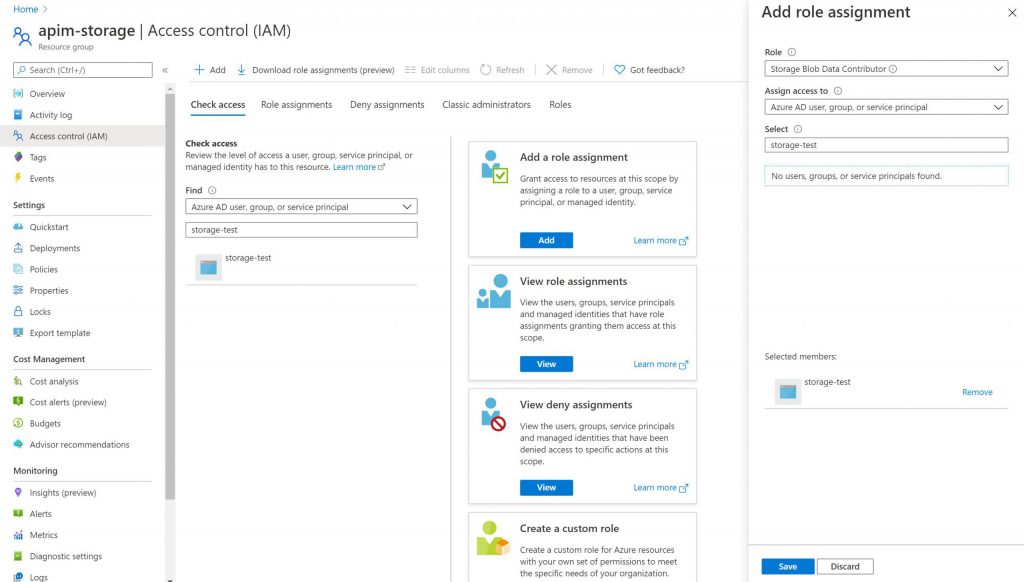
API ManagementのManaged identityが作成できたら、1.で作成したStorage accountに戻り、メニューからAccess controll(IAM)を開きます。 左上の+AddボタンからAdd role assignmentを選んで、API ManagementのManaged IdentityにStorage Blob Data Contributer権限を割り当てます。
これで設定はすべて完了です。
4. 動作確認
API Managementにはテスト用のツールがあるので、それを利用して動作確認します。テストタブからOperationとして作成したUntitledを選択し、Sendボタンを押してみます。
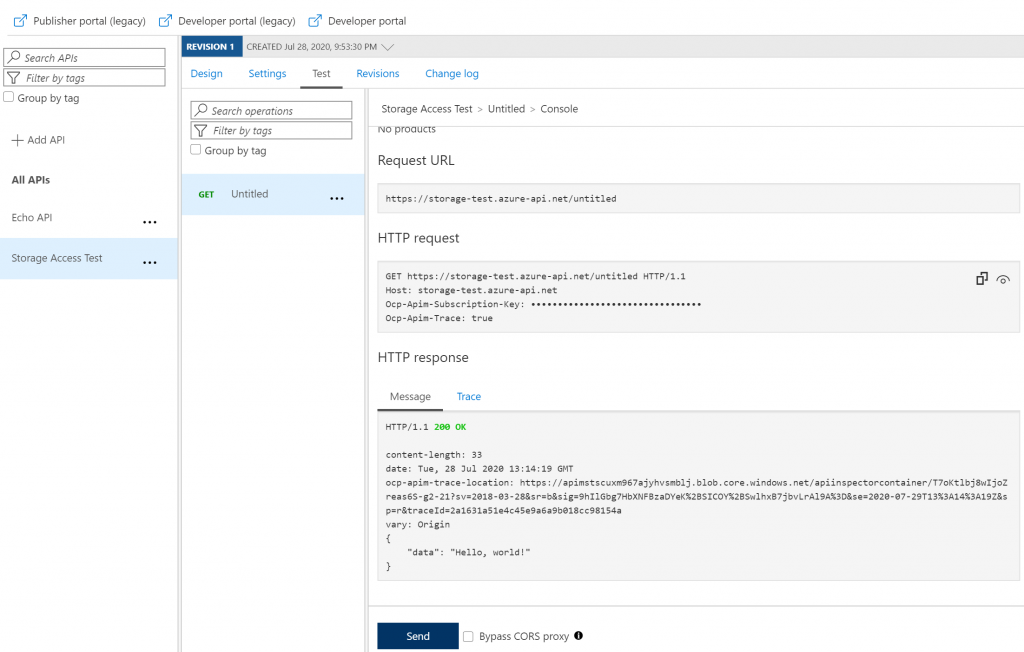
Awesome! ちゃんとBlob storageにアップロードしたJSONファイルの中身がレスポンスとして返ってきていますね。
おわりに
API Managementから簡単にStorage accountに接続することができました。API Managementは僕の業務だと触る機会があまりないので、これから徐々にこういう便利機能を勉強していけたらいいなと思います。最後までお付き合いいただきありがとうございました。では。


![Microsoft Power BI [実践] 入門 ―― BI初心者でもすぐできる! リアルタイム分析・可視化の手引きとリファレンス](/assets/img/banner-power-bi.c9bd875.png)
![Microsoft Power Apps ローコード開発[実践]入門――ノンプログラマーにやさしいアプリ開発の手引きとリファレンス](/assets/img/banner-powerplatform-2.213ebee.png)
![Microsoft PowerPlatformローコード開発[活用]入門 ――現場で使える業務アプリのレシピ集](/assets/img/banner-powerplatform-1.a01c0c2.png)