


 2024-05-24
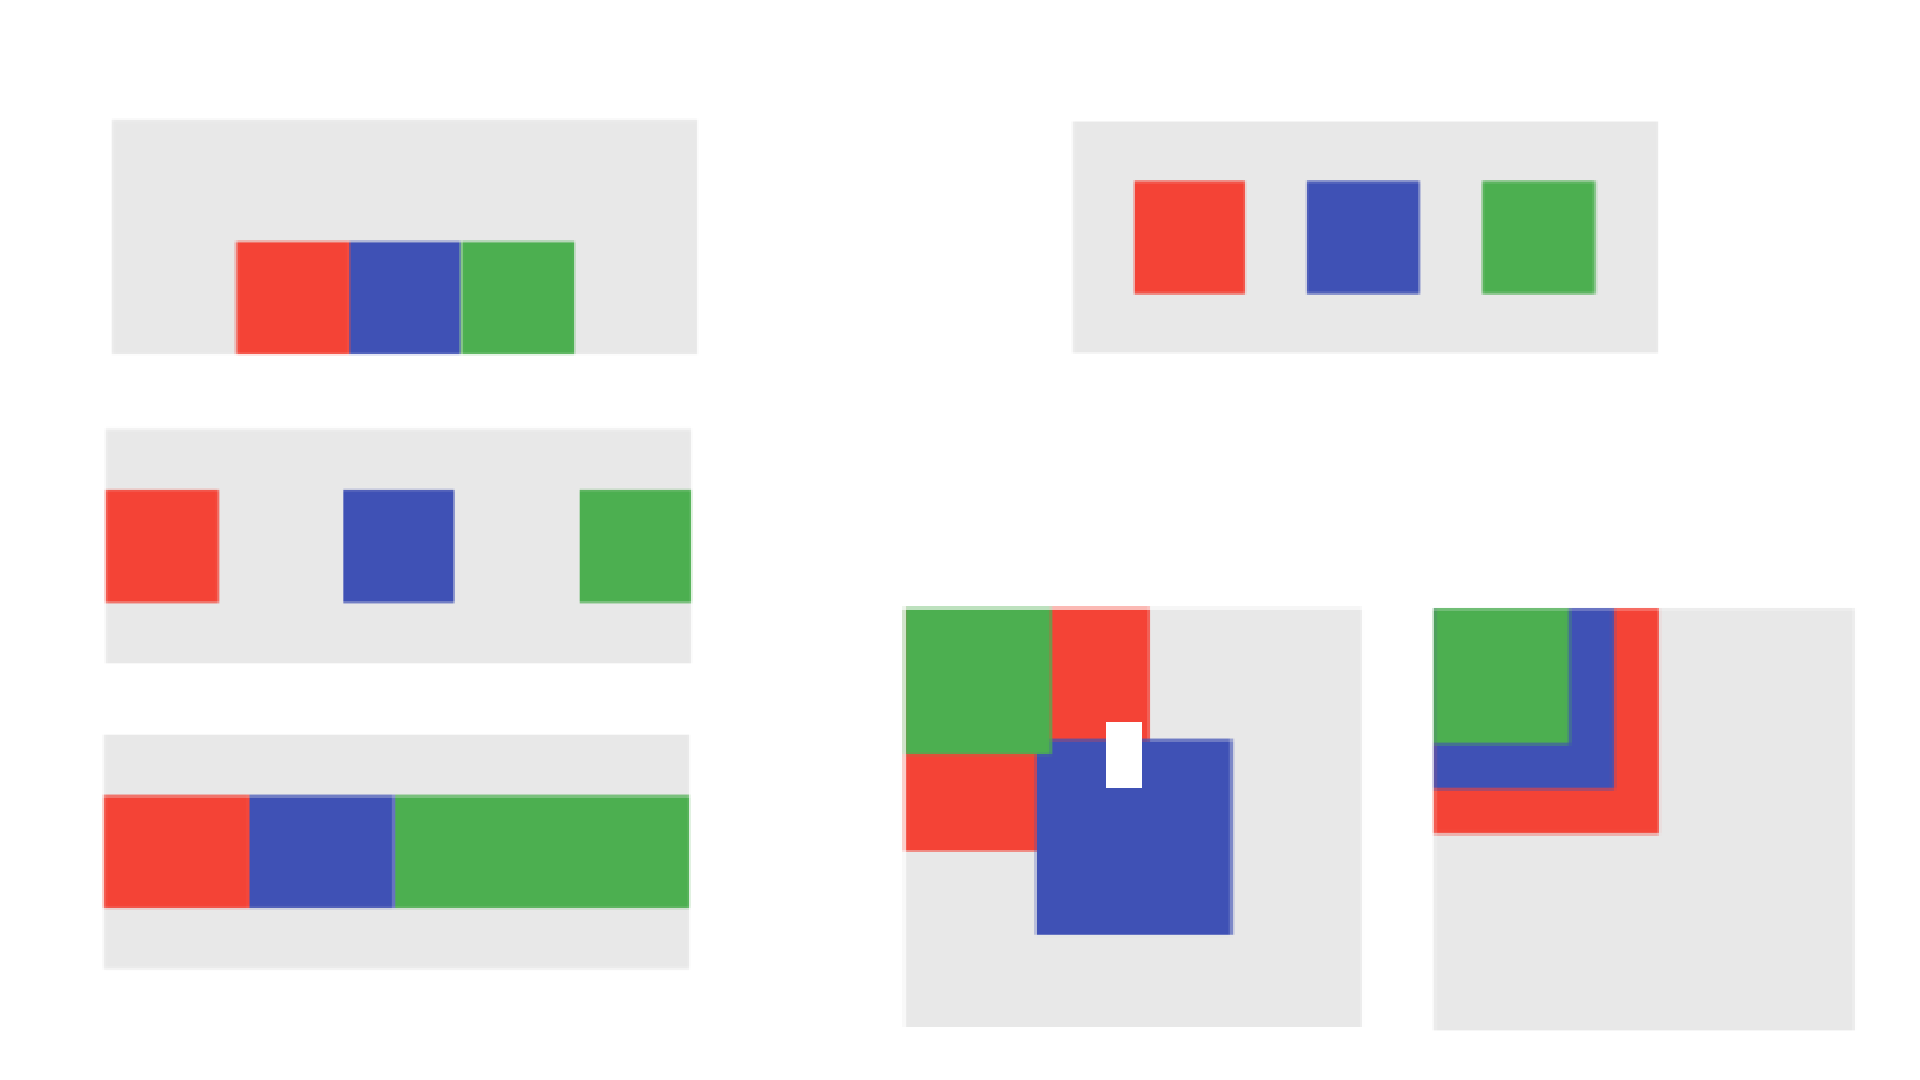

今回はAndroidネイティブ開発(XML)とFlutterの基本的なレイアウトについて比較し、まとめてみました。
Androidの経験はあったがFlutterに触ったことがない方、その逆の方にも役立てるかなと思っておりますので、良ければご覧ください。
基本レイアウト
AndroidとFlutterの親要素の比較表です。
| Android | Flutter | |
| 横に並べたいとき | LinearLayout(Horizontal) | Row |
| 縦に並べたいとき | LinearLayout(Vertical) | Column |
| 重ねて表示したいとき | FrameLayout | Stack |
Androidでは1方向に配置したいとき「LinearLayout」を使い、配置する向きをandroid:orientationで指定します。一方でFlutterでは横に配置には「Row」、縦に配置には「Column」のように別のものを使います。
重ねて表示したいときにはAndroidでは「FrameLayout」Flutterでは「Stack」を使います。
横並びレイアウトの子要素配置について
今回は横並びのレイアウトの配置についてですが、縦並びのレイアウトについても考え方は同じです。
子要素の配置を指定するには、Androidではandroid:gravityで子要素の配置を指定し、FlutterではmainAxisAlignmentとCrossAxisAlignmentを使い指定します。
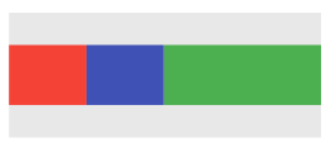
子要素を中央下に配置したいとき
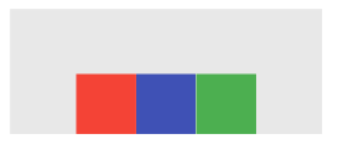
Android
Androidではandroid:gravityにcenterとbottomを指定します。中央で下のような指定方法ですね。
XML<LinearLayout
    android:layout_width="250dp"
    android:layout_height="100dp"
    android:background="#E8E8E8"
    android:gravity="center|bottom"
    android:orientation="horizontal">
    <View
        android:layout_width="48dp"
        android:layout_height="48dp"
        android:background="#F44336" />
    <View
        android:layout_width="48dp"
        android:layout_height="48dp"
        android:background="#3F51B5" />
    <View
        android:layout_width="48dp"
        android:layout_height="48dp"
        android:background="#4CAF50" />
</LinearLayout>
Flutter
FlutterではmainAxisAlignmentにMainAxisAlignment.centerそして、crossAxisAlignmentにCrossAxisAlignment.endのように2つを使い指定します。
主軸(Rowでは横)の位置を指定するのがmainAxisAlignment、そうでない軸(Rowでは縦)の位置を指定するのがcrossAxisAlignmentです。
Container(
  color: const Color(0xFFE8E8E8),
  height: 100,
  width: 250,
  child: const Row(
    mainAxisAlignment: MainAxisAlignment.center,
    crossAxisAlignment: CrossAxisAlignment.end,
    children: [
      SizedBox(
        width: 48,
        height: 48,
        child: ColoredBox(color: Color(0xFFF44336)),
      ),
      SizedBox(
        width: 48,
        height: 48,
        child: ColoredBox(color: Color(0xFF3F51B5)),
      ),
      SizedBox(
        width: 48,
        height: 48,
        child: ColoredBox(color: Color(0xFF4CAF50)),
      ),
    ],
  ),
)
均等に配置したいとき
画像のように各要素を均等に配置する方法です。
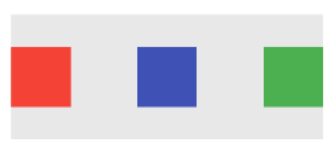
Android
少し強引ですが、各要素の間にandroid:layout_weight="1"を指定したSpaceを配置します。ちょっとごちゃごちゃですね...
XML<LinearLayout
    android:layout_width="250dp"
    android:layout_height="100dp"
    android:background="#E8E8E8"
    android:gravity="center"
    android:orientation="horizontal">

    <View
        android:layout_width="48dp"
        android:layout_height="48dp"
        android:background="#F44336" />

    <Space
        android:layout_width="0dp"
        android:layout_height="0dp"
        android:layout_weight="1" />

    <View
        android:layout_width="48dp"
        android:layout_height="48dp"
        android:background="#3F51B5" />

    <Space
        android:layout_width="0dp"
        android:layout_height="0dp"
        android:layout_weight="1" />

    <View
        android:layout_width="48dp"
        android:layout_height="48dp"
        android:background="#4CAF50" />

</LinearLayout>
Flutter
mainAxisAlignmentにMainAxisAlignment.spaceBetweenを指定し配置します。Flutterだと楽に書けますね~
 Container(
  color: const Color(0xFFE8E8E8),
  height: 100,
  width: 250,
  child: const Row(
    mainAxisAlignment: MainAxisAlignment.spaceBetween,
    children: [
      SizedBox(
        width: 48,
        height: 48,
        child: ColoredBox(color: Color(0xFFF44336)),
      ),
      SizedBox(
        width: 48,
        height: 48,
        child: ColoredBox(color: Color(0xFF3F51B5)),
      ),
      SizedBox(
        width: 48,
        height: 48,
        child: ColoredBox(color: Color(0xFF4CAF50)),
      ),
    ],
  ),
)ちなみですが左右の端にもスペースを空けたいときは、AndroidではSpaceを子要素の最初と最後の要素の位置に追加して、FlutterではmainAxisAlignmentにMainAxisAlignment.spaceEvenlyを指定します。
mainAxisAlignment: MainAxisAlignment.spaceEvenly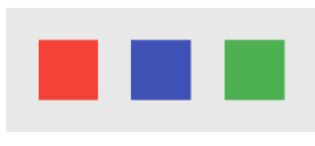
サイズを割合で指定したいとき
子要素のサイズを割合で指定する方法です。
今回は赤:青:緑→1:1:2の比率となっています。
Android
android:layout_weightで割合を指定します。このときandroid:layout_widthを0dpにすることをお忘れなく!
XML<LinearLayout
    android:layout_width="250dp"
    android:layout_height="100dp"
    android:background="#E8E8E8"
    android:gravity="center"
    android:orientation="horizontal">

    <View
        android:layout_width="0dp"
        android:layout_height="48dp"
        android:layout_weight="1"
        android:background="#F44336" />

    <View
        android:layout_width="0dp"
        android:layout_height="48dp"
        android:layout_weight="1"
        android:background="#3F51B5" />

    <View
        android:layout_width="0dp"
        android:layout_height="48dp"
        android:layout_weight="2"
        android:background="#4CAF50" />

</LinearLayout>
Flutter
Expandedを使いflexで割合を指定します。
Container(
  color: const Color(0xFFE8E8E8),
  height: 100,
  width: 250,
  child: Row(
    children: [
      Expanded(
        flex: 1,
        child: Container(
          height: 48,
          color: const Color(0xFFF44336),
        ),
      ),
      Expanded(
        flex: 1,
        child: Container(
          height: 48,
          color: const Color(0xFF3F51B5),
        ),
      ),
      Expanded(
        flex: 2,
        child: Container(
          height: 48,
          color: const Color(0xFF4CAF50),
        ),
      ),
    ],
  ),
)
FlameLayoutとStackの子要素配置
FlameLayoutとStackの子要素の位置を指定する方法です。
こんなレイアウトから

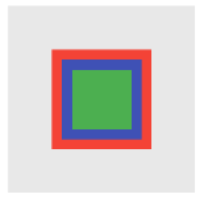
↓
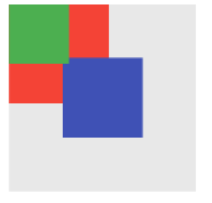
こんな感じに青だけ中心に配置したいときは、Androidではandroid:layout_gravityを使い、FlutterではAlignを使って指定します。
Android
android:layout_gravityにcenterを指定し配置します。
XML<FrameLayout
    android:layout_width="150dp"
    android:layout_height="150dp"
    android:background="#E8E8E8"
    android:orientation="horizontal">

    <View
        android:layout_width="80dp"
        android:layout_height="80dp"
        android:background="#F44336" />

    <View
        android:layout_width="64dp"
        android:layout_height="64dp"
        android:layout_gravity="center"
        android:background="#3F51B5" />

    <View
        android:layout_width="48dp"
        android:layout_height="48dp"
        android:background="#4CAF50" />

</FrameLayout>
Flutter
Alignを使い、alignmentにAlignment.centerを指定して配置します。
Container(
  color: const Color(0xFFE8E8E8),
  height: 150,
  width: 150,
  child: const Stack(
    children: [
      SizedBox(
        width: 80,
        height: 80,
        child: ColoredBox(color: Color(0xFFF44336)),
      ),
      Align(
        alignment: Alignment.center,
        child: SizedBox(
          width: 64,
          height: 64,
          child: ColoredBox(color: Color(0xFF3F51B5)),
        ),
      ),
      SizedBox(
        width: 48,
        height: 48,
        child: ColoredBox(color: Color(0xFF4CAF50)),
      ),
    ],
  ),
)また、FlutterではStack自体にalignmentを使うことで、すべての子要素に一括で設定もできます。
例:すべての子要素を中心に配置
Container(
  color: const Color(0xFFE8E8E8),
  height: 150,
  width: 150,
  child: const Stack(
    alignment: Alignment.center,
    children: [
      SizedBox(
        width: 80,
        height: 80,
        child: ColoredBox(color: Color(0xFFF44336)),
      ),
      SizedBox(
        width: 64,
        height: 64,
        child: ColoredBox(color: Color(0xFF3F51B5)),
      ),
      SizedBox(
        width: 48,
        height: 48,
        child: ColoredBox(color: Color(0xFF4CAF50)),
      ),
    ],
  ),
)
最後に
いかがでしたでしょうか。参考になりましたら幸いです。最後までお読みいただきありがとうございました!


![Microsoft Power BI [実践] 入門 ―― BI初心者でもすぐできる! リアルタイム分析・可視化の手引きとリファレンス](/assets/img/banner-power-bi.c9bd875.png)
![Microsoft Power Apps ローコード開発[実践]入門――ノンプログラマーにやさしいアプリ開発の手引きとリファレンス](/assets/img/banner-powerplatform-2.213ebee.png)
![Microsoft PowerPlatformローコード開発[活用]入門 ――現場で使える業務アプリのレシピ集](/assets/img/banner-powerplatform-1.a01c0c2.png)